At the time of writing, the Power BI service supports 44 different languages. In this article I will show you how you can significantly reduce the effort to translate your tables, columns and measure, while you can do the actual translation in tabular form in an Excel file.
Expectation management
To clear up any misunderstandings right at the beginning: No, my tool does not translate your data model by itself. You have to translate the names of tables, columns and measures yourself. But in this post I provide you with a practical solution that reduces your manual effort in Tabular Editor to a minimum after you have done the translation of the objects. You don’t have to create the individual languages (aka „cultures“) manually and then right click and rename each individual table, column and measure with a mouse click. My tool does that for you. There is already a well-documented solution to this problem by Kasper de Jonge, but it boils down to editing JSON files. However, if you – like me – prefer editing in tabular form in an Excel file, then my current post should help you. In addition, there is an excellent article from the Tabular Editor team, from whom I learned a lot about how the process works manually.
Requirements
In my attempt to find a solution for Excel-based translations, I asked Daniel Otykier – the creator of Tabular Editor – how it is possible to programmatically translate the objects of the data model via C#. Daniel was then kind enough to point me to the macro recorder in Tabular Editor 3 to see how to create languages and do translations for the individual objects via C# script. TE3 is an amazing tool. If you can afford it, buy it! Anyway: Because TE2 is free (download it here), I’ll show you how to do it with TE2. To follow my solution path two requirements must be met:
- You need a version of Tabular Editor (2 or 3) and
- Your data model must be in a premium workspace (premium per capacity or per user) otherwise your translations in Power BI Desktop won’t reach the service.
Before we look at how the whole thing works, a few words about the available languages.
Available languages – or: How to translate into Hebrew and Arabic
When you save a Power BI Desktop file for the first time, the file remembers the initial model language (or default language), which you can determine as follows:
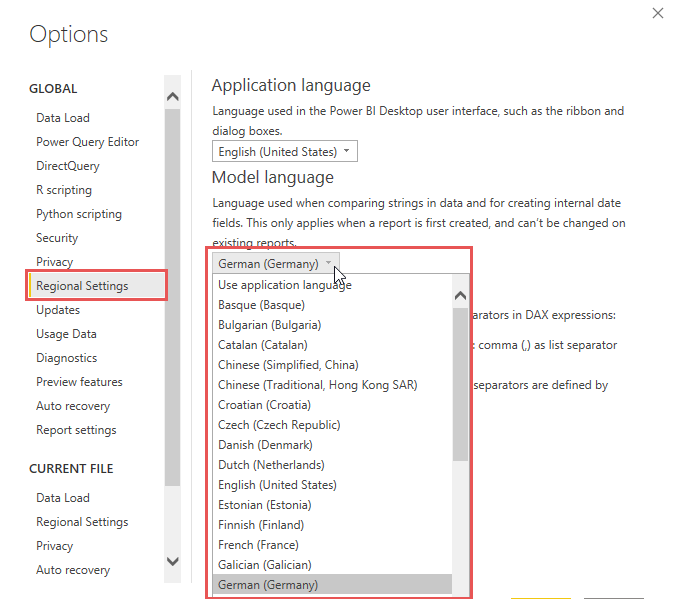
This list contains 42 different languages.
If you go into the Power BI service, you can change the language of the UI there as follows:
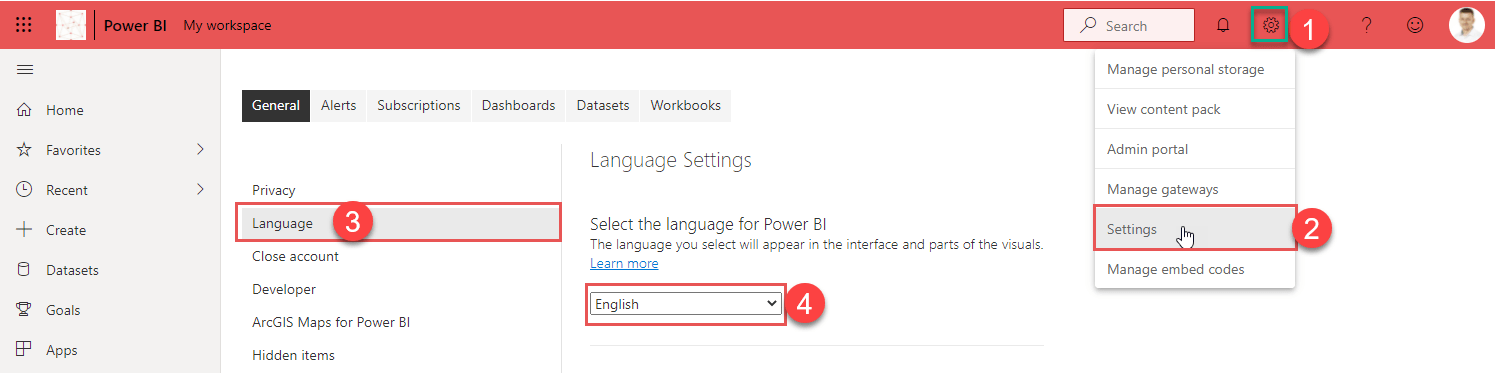
This list contains 44 languages, 2 more than the list in Power BI Desktop. What is the difference? The Power BI service additionally contains the two languages Arabic and Hebrew. The question why these two languages are missing in Power BI Desktop can be answered quickly by selecting one of the two languages in the Power BI service (here using Hebrew as an example):
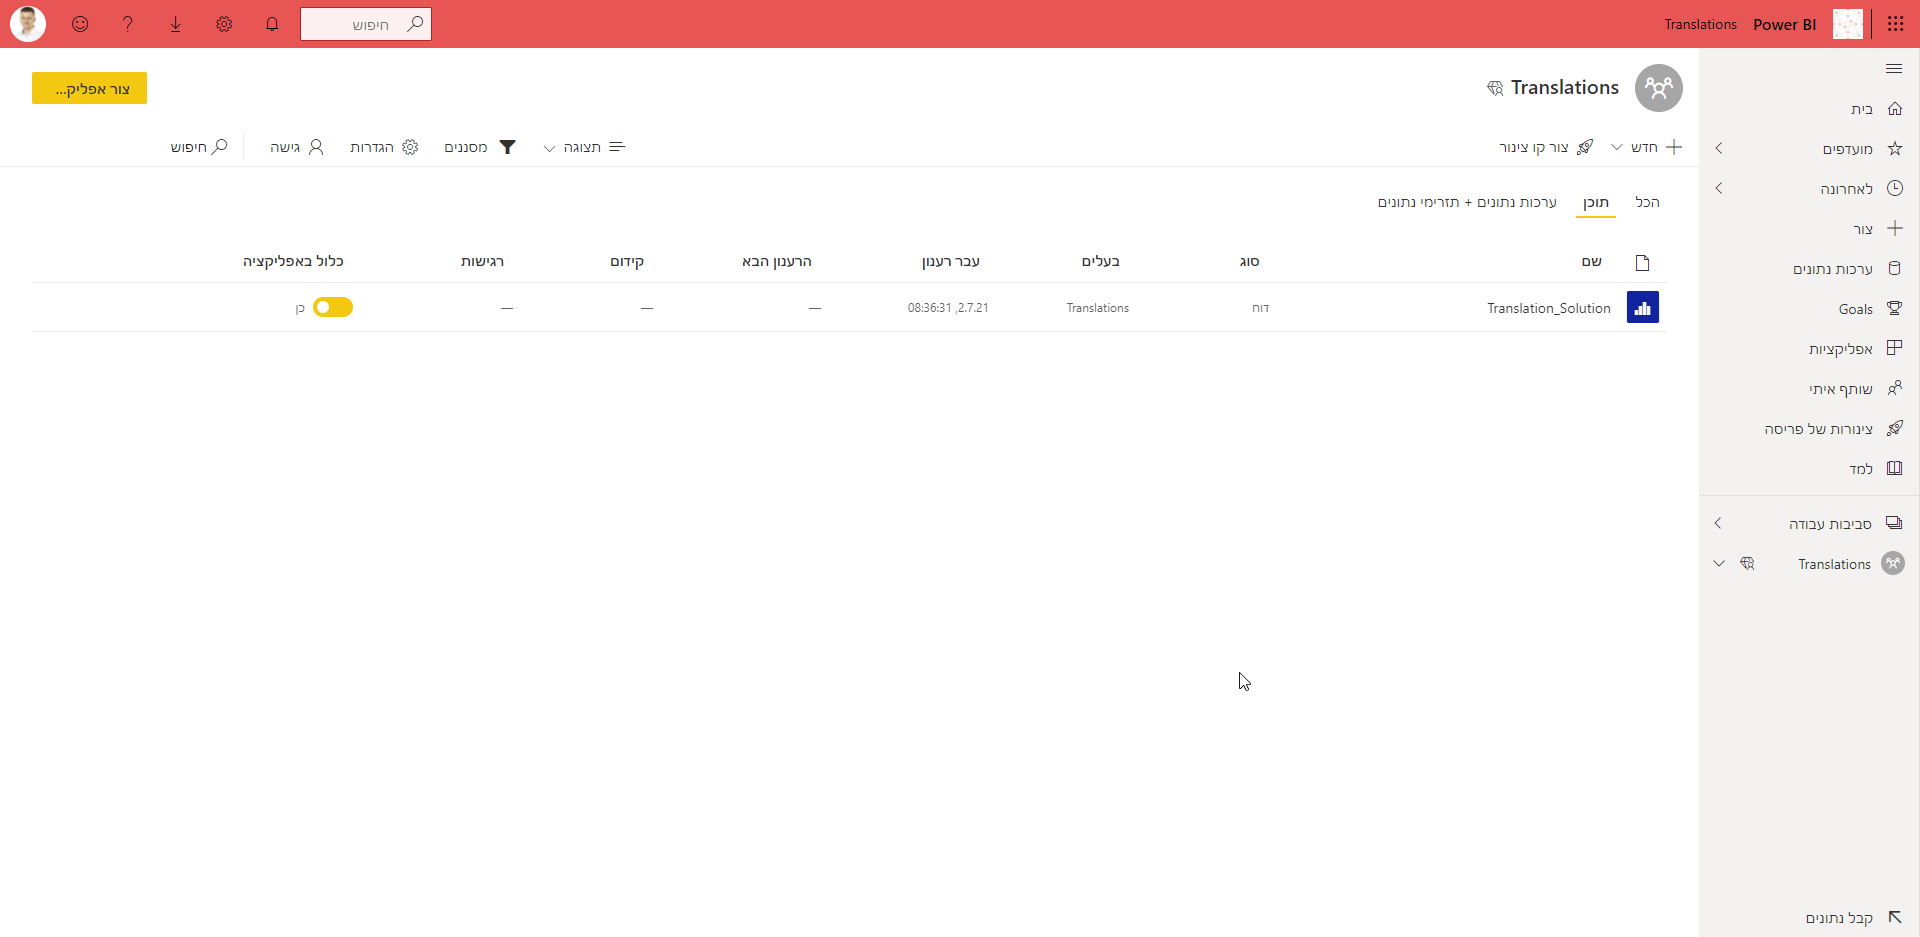
Here, everything suddenly looks upside down. In Arabic it is the same. While this is implementable in a web application like the Power BI service, I guess it would have meant significantly more effort for Power BI Desktop as a desktop application. But that is just a guess.
What my tiny Excel tool does
At the end of this article you will find a video in which I show you how to use the Excel file. Nevertheless, I summarize here briefly the steps that can be implemented with the Excel file.
1. Load tables, columns and measures from the model into the excel file
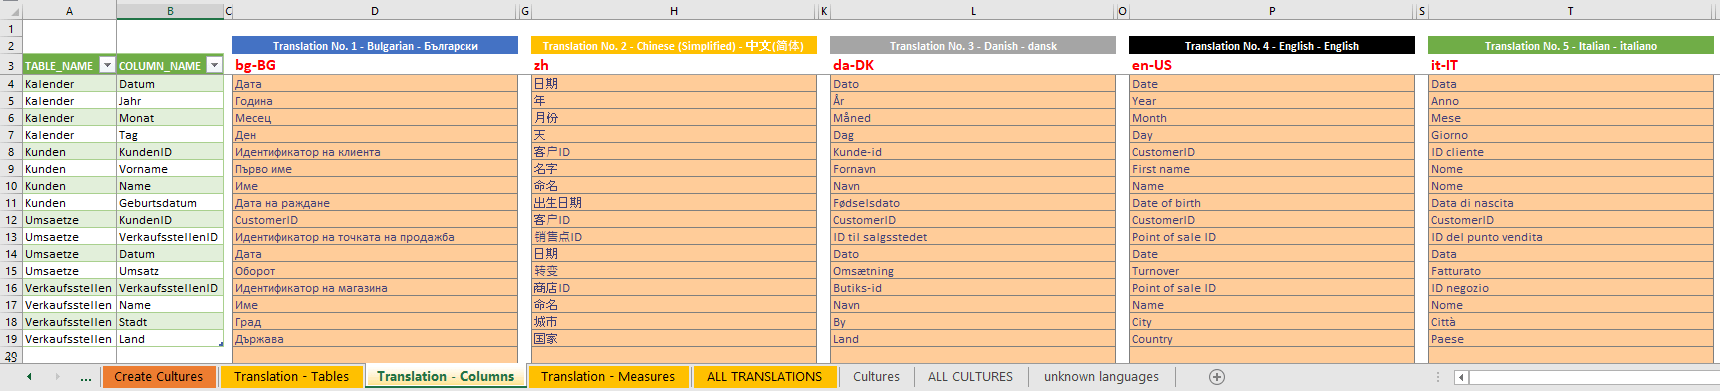
In order to translate the individual objects within Excel, I first have to get them in the initial model language in my Excel file. So that I don’t have to do this manually, I have integrated a Power Query solution that, based on the current process ID of the open Power BI Desktop file, reads these into the sheets ‚Translation – Tables‘, ‚Translation – Columns‘ and ‚Translation – Measures‘.
2. Get the right culture code for your language.
Microsoft has a detailed documentation about which languages are supported in Power BI. Unfortunately, I only noticed this after I started a discussion on Twitter to help me identify the languages (thanks to everyone who participated 😉 ). What is unfortunately missing in this documentation is the corresponding ‚Culture Code‘ of each language, because I need this when I want to create a translation in the data model. An example: For the language ‚Chinese (Simplified)‘ there are – as far as I know – 4 different culture codes: „zh-Hans“, „zh“, „zh-CN“, „zh-SG“. „zh“ is recognized by the Power BI service, „zh-HK“ for example is not. Therefore, I searched for a working Culture Code for each of these 44 languages and checked it against the Power BI service.
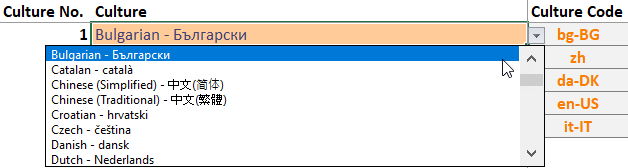
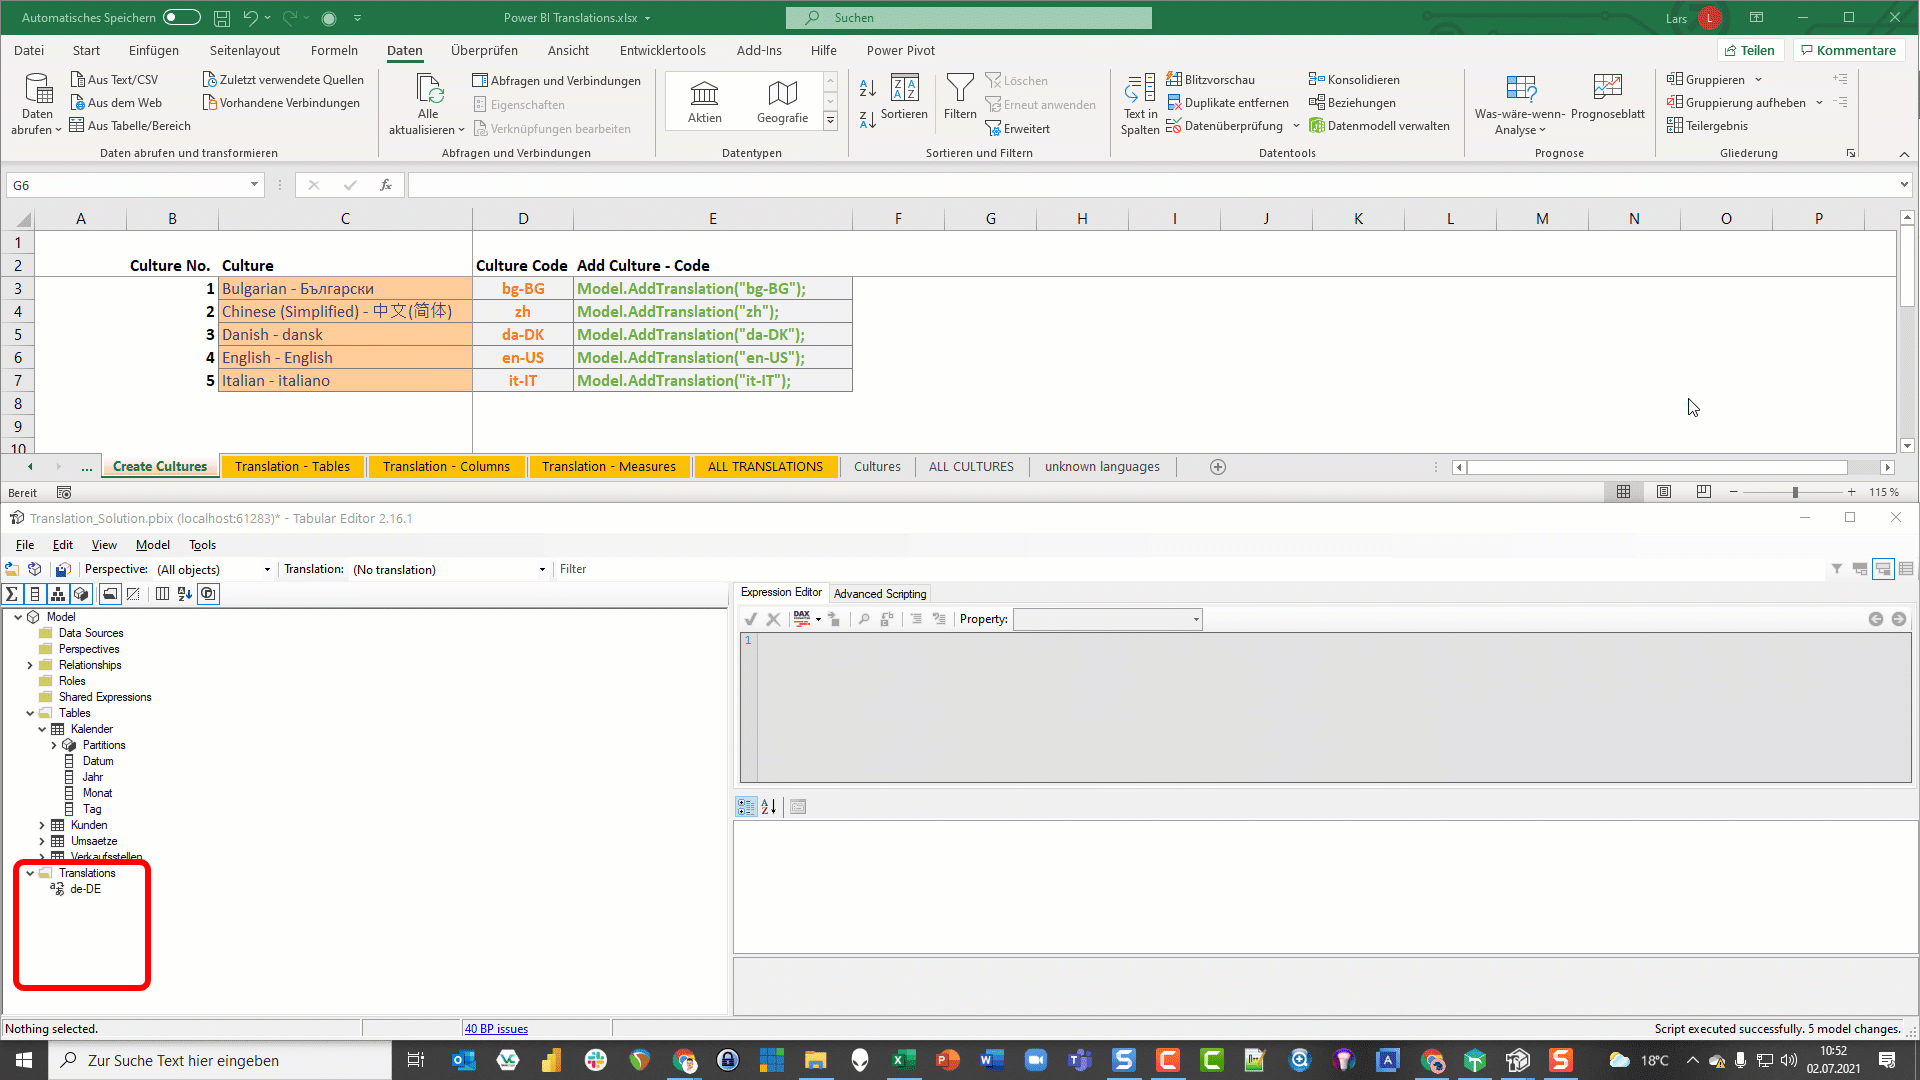
You simply select the desired language via the dropdown (the dropdown offers the language in English and in the original language, which can be very helpful) and the Culture Code then results by itself. My tool is made for up to 5 translations, but you can extend that, if you will.
3. Translate tables, columns and measures in an Excel sheet
After loading the objects of the data model into the Excel file and defining the up to 5 languages you want to translate into, you can perform the translation in tabular form in the sheets ‚Translation – Tables‘, ‚Translation – Columns‘ and ‚Translation – Measures‘.
4. Get the C# code you need for tabular editor
Now that the translations are in Excel, I still need to get them into the data model. For this, my tool generates C# code in 2 places, which I can simply paste into the Advanced Scripting window of Tabular Editor.
- Place #1: Sheet ‚Create Cultures‘ → you will find in column E the code to create the cultures in Tabular Editor.
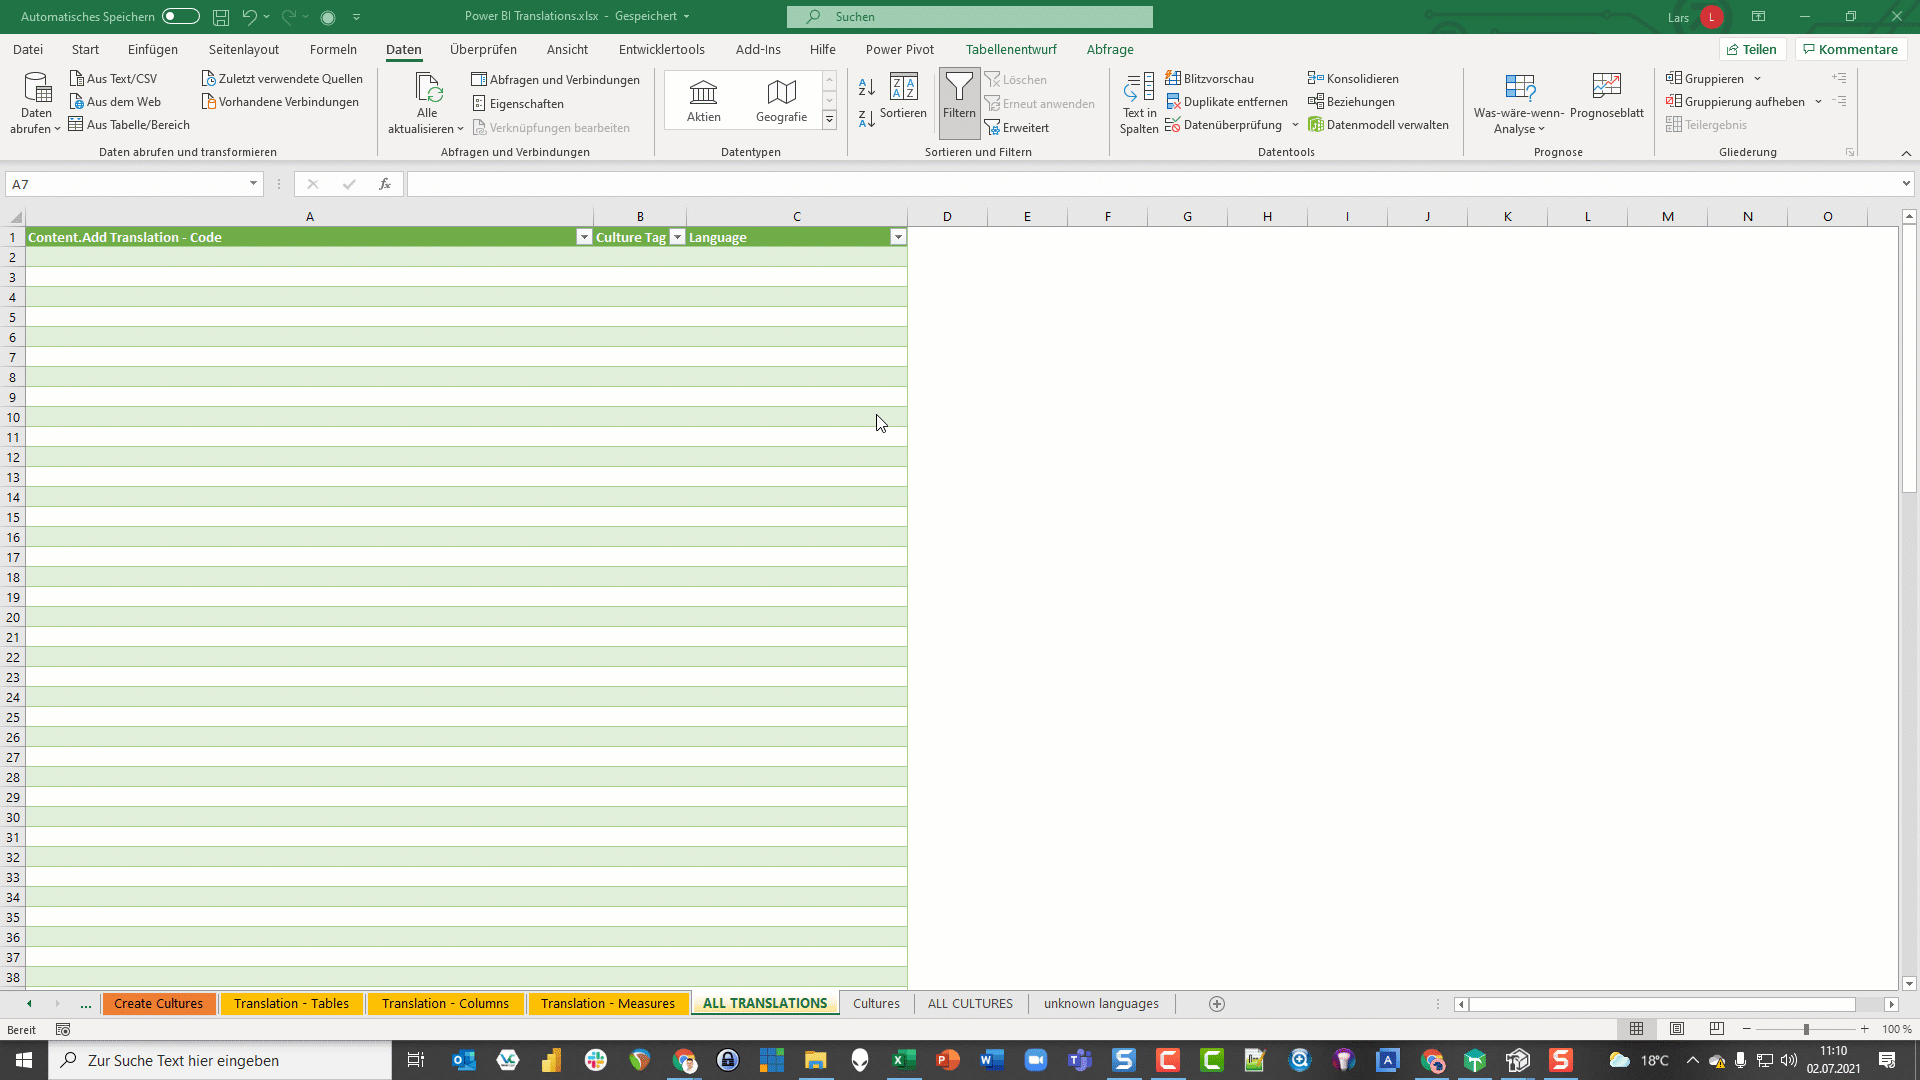
- Place #2: Sheet ‚ALL TRANSLATIONS‘ → This table is based on a power query that combines the translations from the sheets ‚Translation – Tables‘, ‚Translation – Columns‘ and ‚Translation – Measures‘. Update this query and paste the content of the first column into the Advanced Scripting window of Tabular Editor and your translations are done 🙂
Download
You can download my Excel file here.
Known Limitations
If your data model changes – e.g. you add measures and now also want to translate these – then reloading the tables, columns and measures can lead to the fact that the translations already made are no longer in the correct row.

Video
Sie sehen gerade einen Platzhalterinhalt von YouTube. Um auf den eigentlichen Inhalt zuzugreifen, klicken Sie auf die Schaltfläche unten. Bitte beachten Sie, dass dabei Daten an Drittanbieter weitergegeben werden.
Cheers from Germany,
Lars

Lars ist Berater, Entwickler und Trainer für Microsoft Power BI. Er ist zertifizierter Power BI-Experte und Microsoft Trainer. Für sein Engagement in der internationalen Community wurde Lars seit 2017 jährlich durch Microsoft der MVP-Award verliehen. Lies hier mehr…
cndg meint
Hi there,
Thank you for this great solution! I’m currently struggling with getting the host name for my use case. Our dataset is saved to a folder, and when I open it, no host name is being displayed. I can’t open it from desktop. How can I get around that?
Thank you in advance!
Max meint
Thank you for this great article.
I have been reading a lot of articles like this but non of them explain anything about how to setup or interact with Power BI Premium.
We have a Premium Workspace at work, but this isn’t the only requirement, I need to know how to setup the Premium workspace or how to setup Power BI Desktop to take advantage of the Premium Workspace to make use of my translated Metadata.
For example, if I start a brand new report and Get data from local csv files, I can open Tabular Editor or Metadata Translator and input my translations. But when I publish to my Premium Workspace, changing locale has no effect on the report.
I suspect this isn’t how I’m supposed to do it but I cannot find any information on how to make this work.
Should my dataset already be on the Premium workspace? I tried accessing a dataset that was already on the Premium workspace but I get a 401 error (The remote server returned an error:(401) Unauthorized). If this is the way, how do I fix this error?
Does anything need to be done on the admin side of the Premium Workspace?
I’m sorry for the long question, I’ve been trying to figure this out for weeks and I can’t find anything.